
When it is time to start working on your school’s master schedule, it can be a stressful time for everyone.
Creating a master schedule, especially from scratch can be tedious, overwhelming, and overall just draining. How could it not be? There are so many aspects to consider. Teacher availabilities, time slots, courses offered, and trying to cater to each student is definitely not an easy task. Even so, it is essential for the head of school to help ensure that things would run smoothly.
What can you do to make sure this process is more efficient and effortless? The scheduling process can flow smoothly when your team starts preparing early. It is always beneficial to keep ahead of time. (To be fair, that applies to all affairs and not just scheduling!)
The key here to harmoniously build a master schedule is *drumroll please* with the help of an efficient online master scheduler (pst…it’s us) If you have been using an online master schedule (OMS) before, you would know that all the pre-settings are done for you, provided you have no changes between the different semesters. Let’s see how Orchestra can make it more harmonious for your team!
Using Orchestra allows you to simply run the program and it will automate the schedule for you. With only 5 simple steps, Orchestra can allow your team to sit back a little and not be too tensed while building your ideal master schedule.
What You Need to Know about Our Master Scheduler?
Orchestra offers simple and straightforward steps to scheduling. Despite its simplicity, we provide you with a guide including tips and tutorials to make it even easier for you to start scheduling.
Complete your master schedule in just 5 easy steps:

The first step is to configure your courses and teachers. Decide the courses you want to include along with the teachers for each class. You will also configure your course request templates during this step. After ensuring all your current course offerings are up in both the district and campus course catalogs, see that both yearlong and single-semester courses are set up as well.
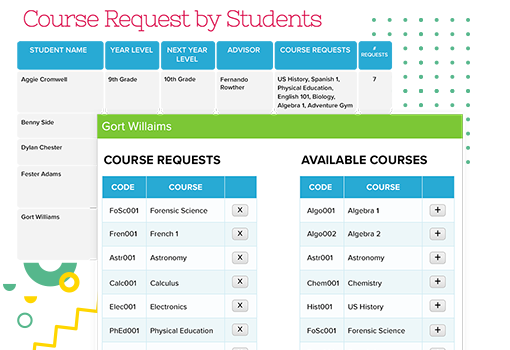
The second step is to manage course requests. We have a few options for managing your course requests: either requests by students, by course, or even bulk course requests. If a course gets dropped, you have the ability to bulk move all the students to an alternate course.
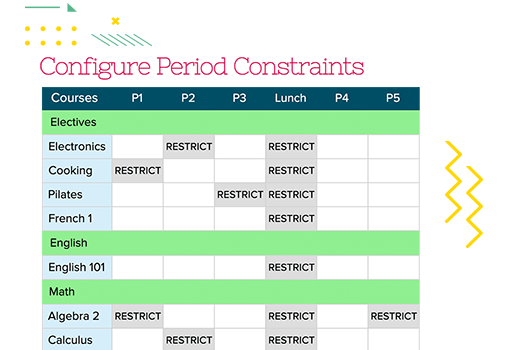
Thirdly, you can now set your constraints. Decide the time slots available, which teacher is available to teach the class, or even how many students one section can hold. Your unique parameters can be set here. It all depends on you; highly flexible according to how you wish them to be
.
Now you are ready to generate your schedule! Don’t sweat it if feel like you have not created the perfect schedule yet, since you can always edit them later. You will be able to quickly drag and drop your sections after the generator has produced your schedule, for any last-minute changes as you wish.

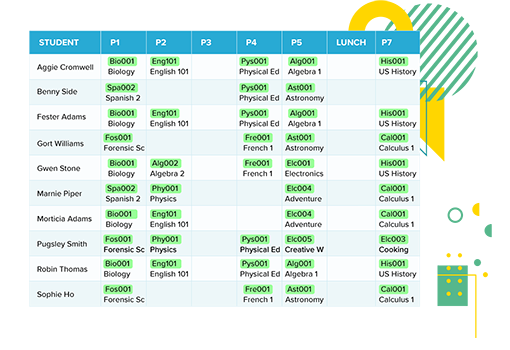
Step 5, load students into the schedule. And..Master Scheduler- Done and dusted!✅ Now all you have to do is publish and share the schedule.
Sign up for Orchestra today and experience our efficient online master scheduler for yourselves!


5 thoughts on “How Your Team Can Build a Master Schedule in Harmony”