
Building a schedule from scratch is just like solving a giant puzzle. With focus, patience, and a little determination, you can do it. In this guide, we’ll walk you step-by-step through creating a school master schedule in Excel and show exactly what it takes to keep it running smoothly.
- Step 1: Define Your Scheduling Needs
- Step 2: Set Up Your Excel Sheet
- Step 3: Input Teacher and Class Data
- Step 4: Decide Your Colour System
- Step 5: Avoiding and Fixing Conflicts
- Step 6: Using Excel Tools to Identify Scheduling Conflicts
- Step 7: Optimize and Finalize
- Pros and Cons of Using Excel To Create a School Master Schedule
- Final Thoughts
Step 1: Define Your Scheduling Needs
First, you need to gather and organize all the raw data:
- Teachers: Full-time, part-time, and their subject areas.
- Courses: Course codes, names, prerequisites, and which teacher will teach each class.
- Classrooms: Room numbers, capacities, and special requirements (labs, gyms, etc.).
- Time Blocks: Number of periods per day and start/end times.
- Constraints: Teacher availability, room availability, and shared resources.
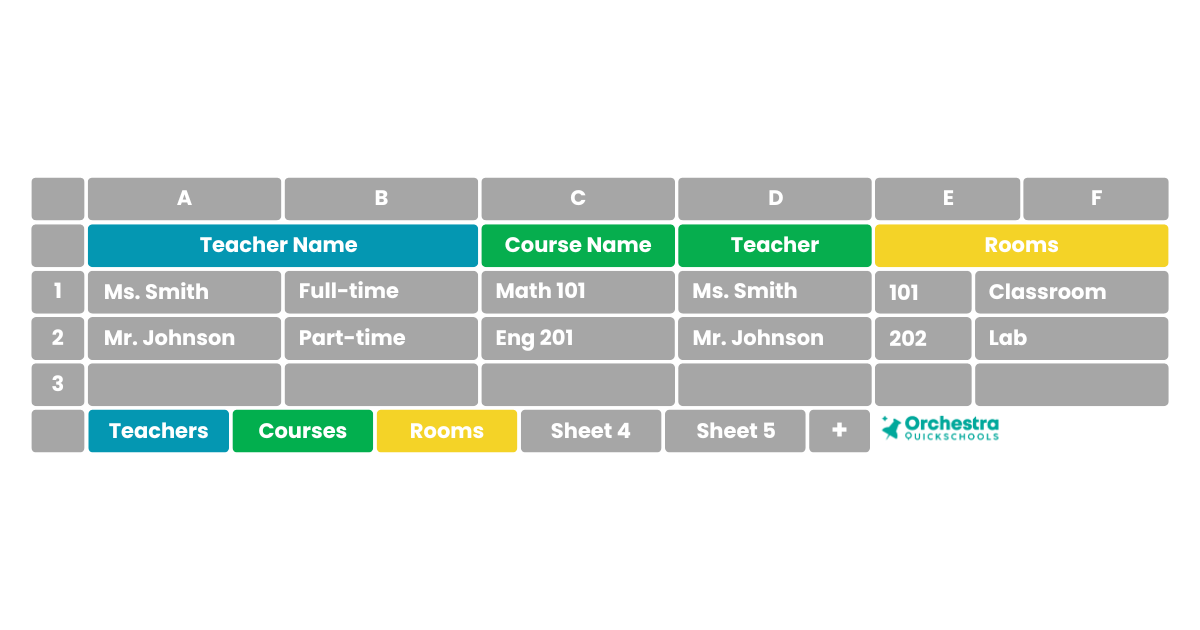
Tip: Use separate sheets in Excel to organize this information:
- Sheet 1: Teachers
- Sheet 2: Courses
- Sheet 3: Classrooms
- Sheet 4: Time Blocks
- Sheet 5: Constraints
Having this information organized beforehand will make creating the Excel schedule much smoother. This way, everything is visible and easy to reference when building your schedule.
Step 2: Set Up Your Excel Sheet
- Open a New Workbook: Start with a blank Excel workbook.
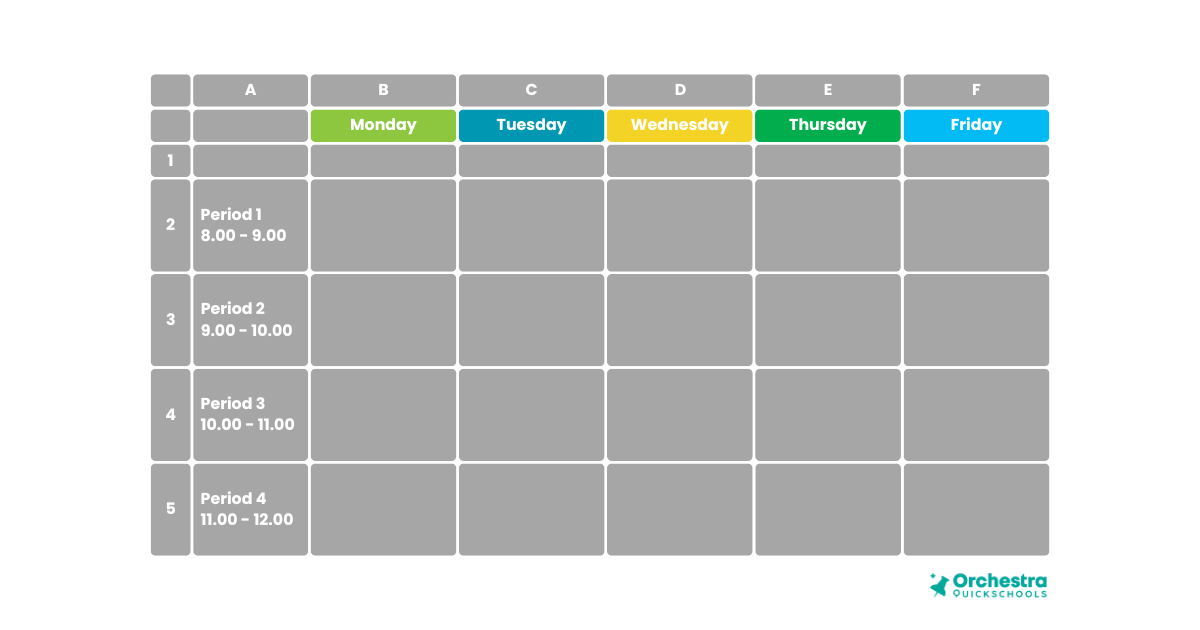
- Create Headers: Use the first row for your days of the week (Monday–Friday).
- Add Time Blocks: Use the first column for periods or class times.
- Format for Readability: Apply bold text to headers, freeze the top row and first column, and use borders to separate periods and days.
Step 3: Input Teacher and Class Data

Now you need to start populating the grid:
- Assign each course to a period and a classroom.
- Cross-check teacher availability for each time block.
- Make sure rooms aren’t double-booked
- Consider prerequisites so students can take courses in the correct sequence.
This process involves a lot of copying and pasting, manual checking, and meticulous attention to detail. One mistake, like assigning the same teacher to two classes in the same period, can ripple through the schedule and create dozens of conflicts.
You can structure this in a couple of ways:
- Manual Entry: List teachers and courses directly into the grid.
- Linked Data: Create a separate tab with teacher names, courses, and rooms, and use formulas such as VLOOKUP or INDEX/MATCH to pull data automatically.
For smaller schools, manual entry might be fine, but as your scheduling needs grow, linking data using formulas will save time and reduce errors.
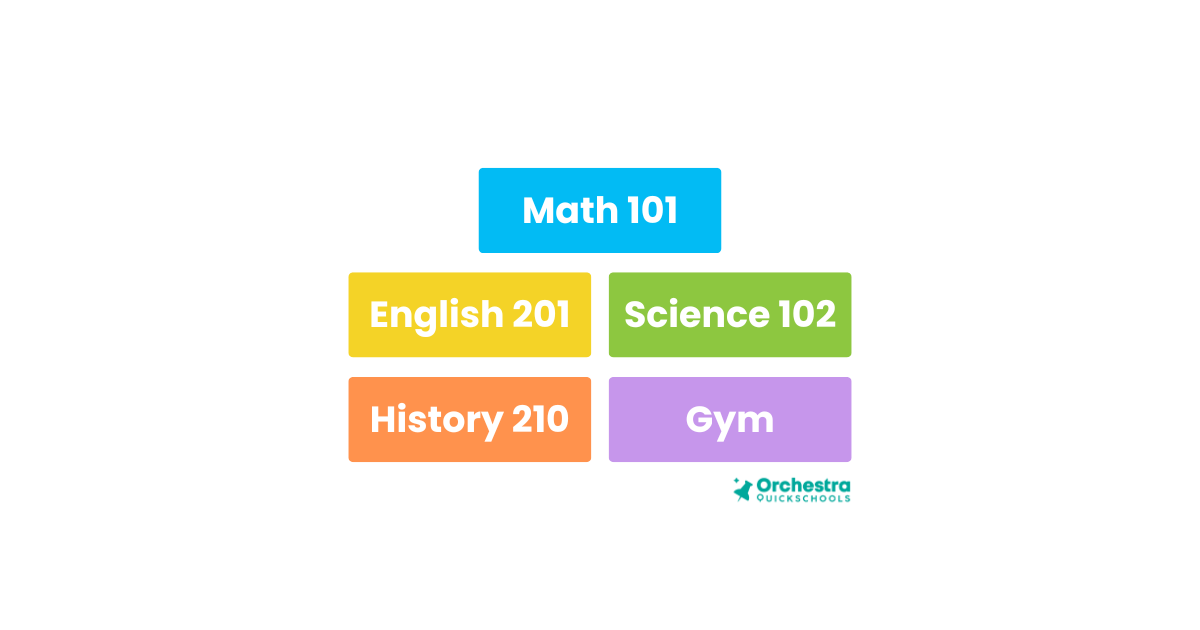
Tip: For clarity, you can colour-code subjects. This makes it easy to see your schedule at a glance.
Step 4: Decide Your Colour System
To Color a Single Class Cell,
- Select and right-click on the cell
- Click Format Cells from the drop-down menu
- In the Format Cells window, click the Fill tab
- Click the Background Color dropdown
- Choose a colour
- Click OK
Step 5: Avoiding and Fixing Conflicts
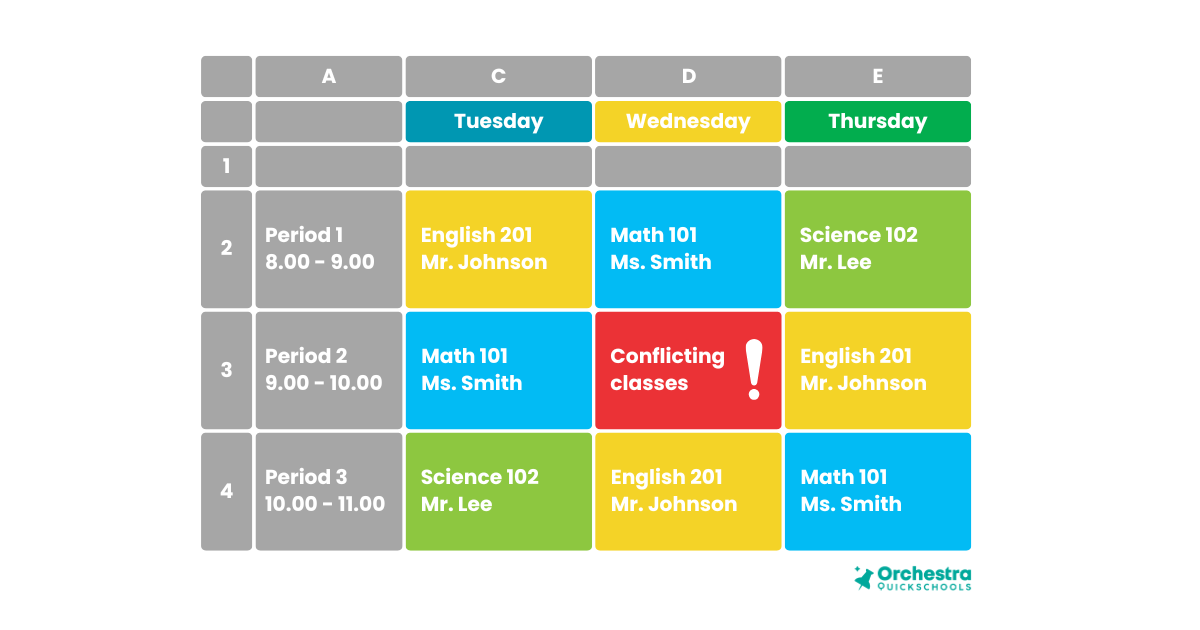
After the initial assignment, you need to check for conflicts and refine your schedule. This is where it can get tricky. Conflicts are the biggest headache in scheduling. Excel does not warn you if a teacher is double-booked. To check conflicts, you will need to:
- Manually scan each row (period)
- Look for the same teacher appearing twice in the same row
- Repeat this for all five periods
- Repeat the process for every school day
If you find a conflict:
- You must manually move one class
- Then recheck the entire schedule again
Step 6: Using Excel Tools to Identify Scheduling Conflicts
Spotting conflicts is tedious. And the more teachers, students, and classrooms you have, the more complex this becomes. Here are some Excel tools that can help:
Conditional Formatting: Highlights duplicate teachers or rooms.
- How to Set Up Conditional Formatting
- Click and drag to select your entire schedule grid
(For example: cells B2:F6) - In the top menu, click Home
- Click Conditional Formatting
- Hover over Highlight Cells Rules
- Click Duplicate Values
- In the dialog box:
- Leave Duplicate selected
- Choose a highlight color (for example, light red)
- Click OK
- Click and drag to select your entire schedule grid
📌 Important:
If a teacher teaches multiple classes in different periods, Excel may highlight false positives. You must manually decide whether it is an actual conflict.
Filters & Sorting: Filters help you manually inspect whether a teacher or room is overbooked.
- How to Turn on Filters
- Click the row containing your column headers (Monday–Friday)
- Click Data in the top menu
- Click Filter
Small dropdown arrows will appear at the top of each column.
- How to Filter by Teacher Name
- Click the dropdown arrow for a day (e.g., Monday)
- Type teacher name (e.g., Ms. Smith) in the search box
- Click OK
Excel will now show only classes containing that teacher for that day.
📌 Limitation:
Filters work one column at a time, meaning you must repeat this process for all school days individually.
Data Validation: Data Validation helps prevent typos by limiting entries to predefined values.
- How to Set Up Data Validation
- Create a separate sheet called Teacher List
- In column A, list all teachers.
- Apply Data Validation to the Schedule
- Go back to the Master Schedule sheet
- Select the cells where teacher names will appear
- Click Data in the top menu
- Click Data Validation
- Under Allow, select List
- Click the Source field
- Select the teacher names from the Teacher List sheet
- Click OK
- Each cell will display a small drop-down menu when clicked, allowing you to choose a teacher from the list.
📌 Important:
If a teacher leaves or a new teacher joins, the validation list must be edited manually.
At this stage, your schedule is complete and easy to read. Just make sure to keep your teacher, course, and classroom sheets as references. They will come in handy if you need to make updates later.
Step 7: Optimize and Finalize
Once the basic schedule is filled in and conflicts are out of the way, the next step is refinement, which requires careful manual review. This involves scanning the timetable for unused gaps that could be better utilized, adjusting class periods to balance teacher workloads more evenly across the day, ensuring that high-demand or core subjects are not clustered into the same time slots, and sharing the draft schedule with department heads to confirm teacher availability, preferences, and any overlooked constraints.
Every change can affect multiple other cells in the grid. A single adjustment, like a transfer student, a teacher going on leave, or a classroom being closed, might require hours of reworking the schedule.
Pros and Cons of Using Excel To Create a School Master Schedule
Before wrapping up, it’s important to weigh the benefits and limitations of using Excel for school scheduling, especially when deciding whether it is the right tool for your school.
| Pros | Cons |
| Low cost: Excel is often readily available in schools, making it a cost-effective solution | Highly manual process: Requires entering, adjusting, and maintaining all data by hand. |
| Familiar interface: Many school administrators and staff already have a basic experience using Excel. | No Automatic Conflict Detection: All conflicts must be manually checked, and issues may remain unnoticed until they occur in real-time. |
| Flexible layout: Excel allows you to customize tables, sheets, and formats to match your school’s timetable structure. | Managing Multiple Sheets Becomes Overwhelming: Every change must be updated in the source sheet. This requires constant cross-checking to ensure nothing is missed. |
| Good for Small Schools: Schools with fewer students, limited course offerings, or simple scheduling needs can successfully manage schedules in Excel. | Error-prone Across Versions: Multiple edits, copied sheets, or shared files can easily lead to outdated or conflicting versions of the schedule, especially when several staff members are involved. |
| Full Manual Control: Excel gives complete control over every detail of the schedule, which can help understand how classes, teachers, and time blocks interact. | Difficult to scale: As student numbers grow and scheduling rules become more complex, Excel becomes increasingly fragile, harder to update, leading to more stress to manage. |
Final Thoughts
By this point, it becomes clear that while Excel can indeed be used to create a school master schedule, it is far from a simple task. Building a timetable in Excel requires constant manual input, careful cross-checking, and ongoing adjustments, making the process time-consuming and prone to error. That said, for schools that are just starting, have very few students, or only need a basic, short-term schedule, Excel can be a workable solution and a useful way to understand the mechanics of scheduling.
However, as student numbers grow, schedules become more complex, and real-life changes occur, managing everything manually can quickly become overwhelming. If you’d rather avoid the stress that comes with maintaining a master schedule in Excel, upgrading to an automated solution this year may help. We’ve also put together a step-by-step guide to school master scheduling software, in case you decide to make the switch and let it handle the heavy lifting. As your school grows and changes, the right system will grow and adapt easily with you.
Lastly, we hope this step-by-step guide for Excel helped you along the way.
